Setting up Firebase
- Setup and Create Firebase Project
- Enable Phone Authentication
- Uploading Default Images
- Firebase Database Security Rules
- Enable Notifications
- Enable Schedule Messages
- Force Update Mode
Setup and Create Firebase Project
since this app was built using Firebase ,you have to create a New Project on Firebase by going to Firebase Console then sign in using your google account if your'e not signed in , then create a new Project and set the name you like for the project, then:
- click on Add Firebase to your IOS app
- copy the bundleIdentifier from Xcode and paste it as
IOS bundle ID

- Click on Register App > Next
- click on Download
GoogleService-Info.plist. it will download a.plistfile we will use it later

- you can skip the remaining setup steps
- next drag the downloaded
GoogleService-Info.plistand drop it in Xcode > FireApp - drag it again and drop it in Xcode > NotificationService

- now open up the
GoogleService-Info.plistinFireAppthen copy theREVERSED_CLIENT_IDvalue then go toInfo.plistand paste it in URL Types > URL Schemes


- next up go to
NotificationService>GoogleService-Info.plist> and add.NotificationServiceat the end inBUNDLE_ID

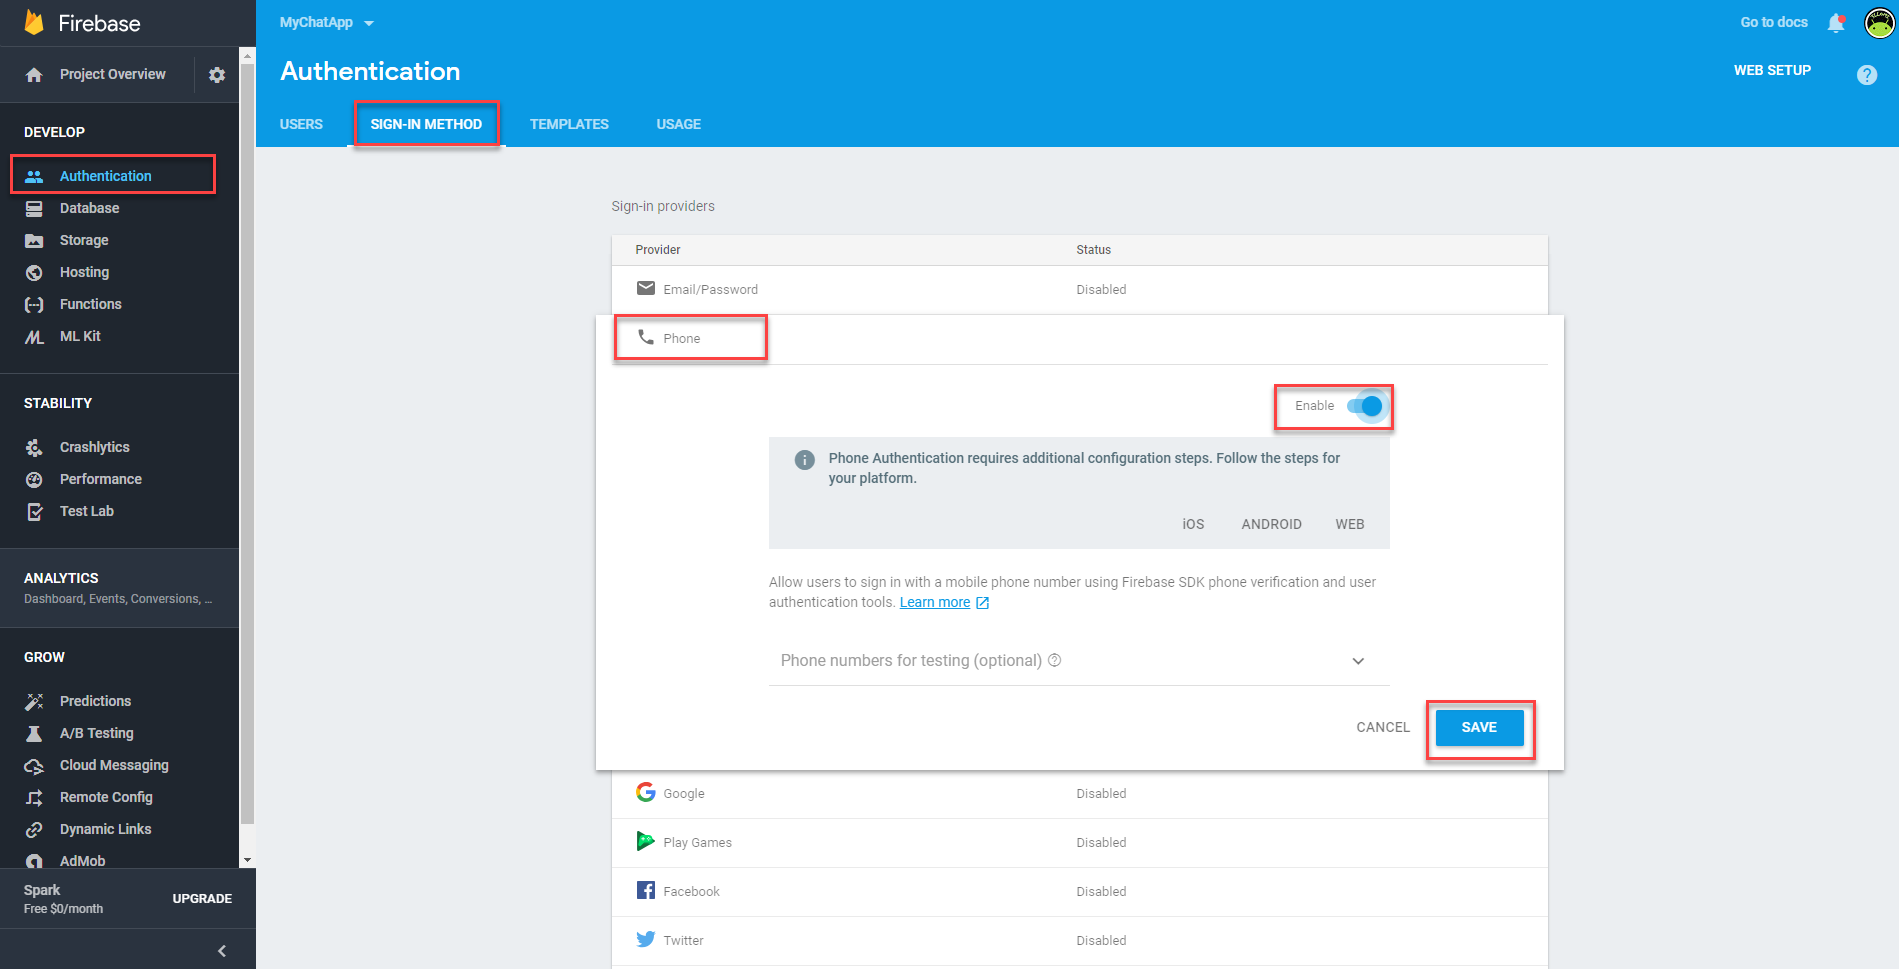
Enable Phone Authentication
next up you have to Enable Phone Authentication in Firebase Console by going to :
- Authentication
- Sign-In Method
- click on Phone
- enable it then save
Uploading Default Images
{warning} if you did not upload these images you will see an error while registering after confirming your phone number
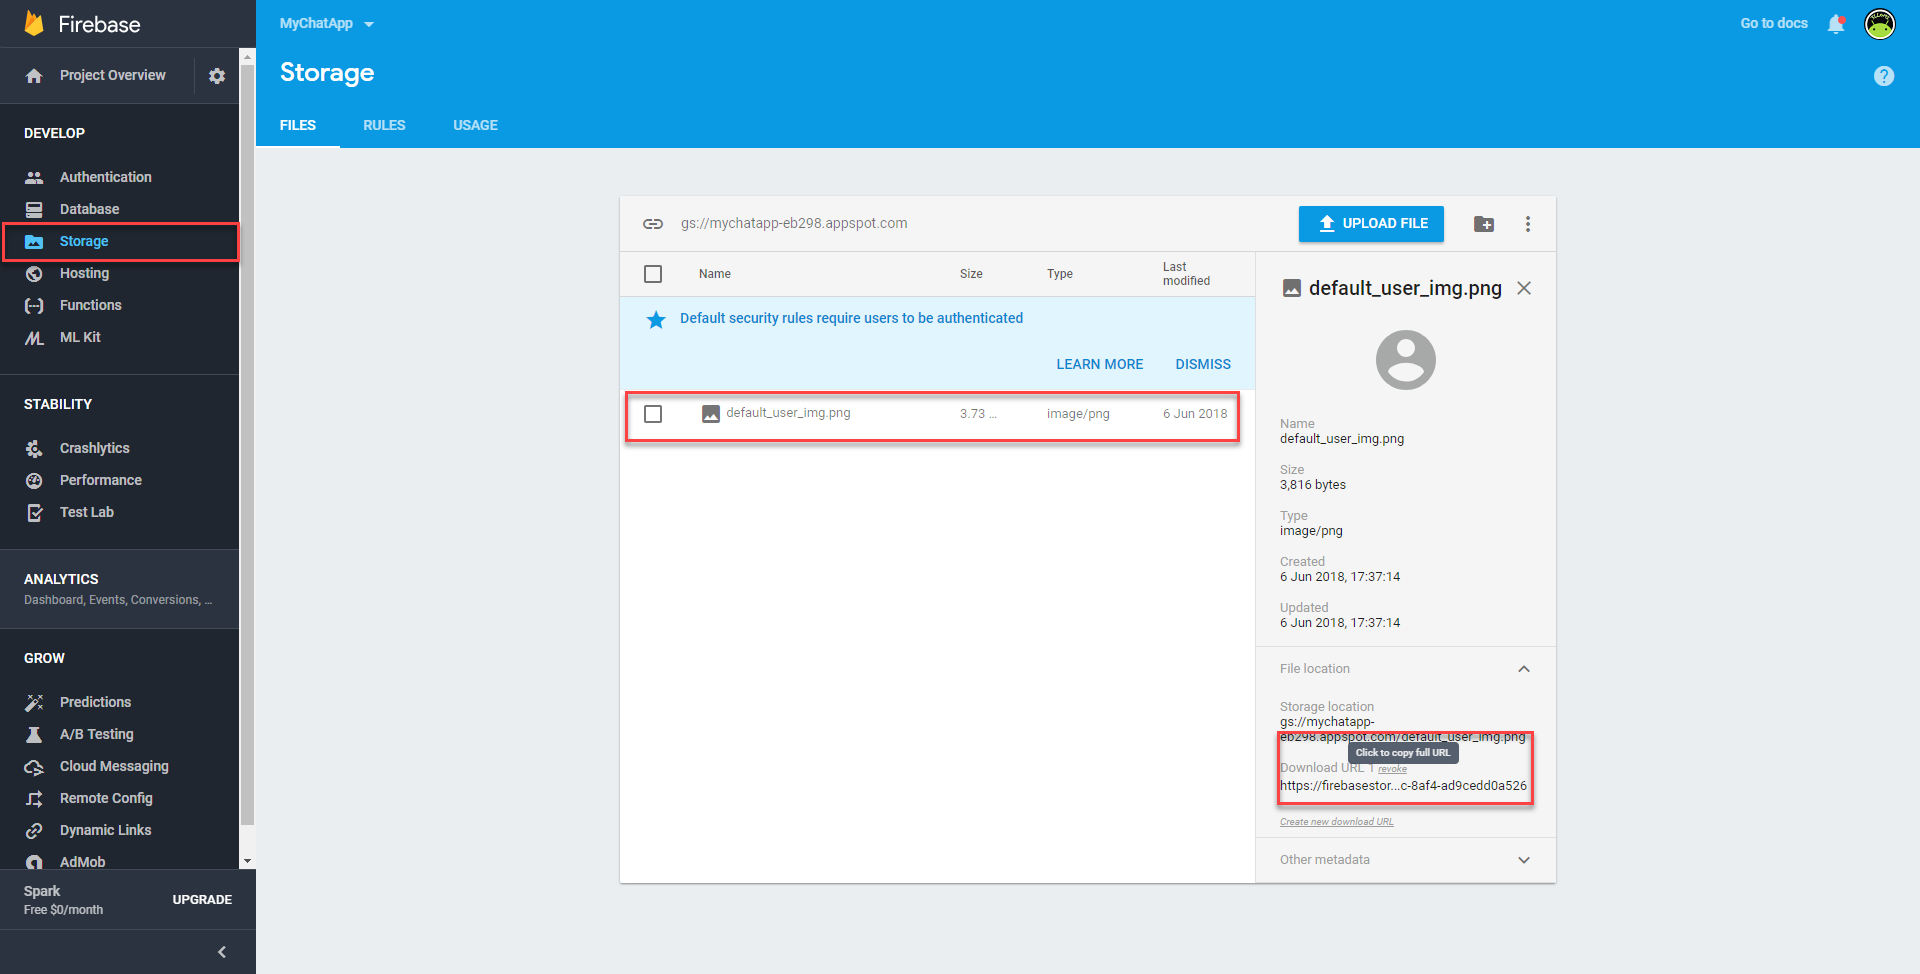
now you have to upload the default user image, this image is used by default when a user registered in the app for the first time and he did not pick a Profile image.
to do that go to Firebase Console > Storage then click on Upload File.
you can upload your own default user profile photo or you can upload the included image in Firebase Console - Files\default_user_img.png
after uploading, click on the uploaded image > Expand File Location > click on Download URL. this will copy the uploaded url to save it in Database later.
go to Database and add a new node by hitting the little plus icon

(choose Firebase Realtime Database if prompted)
then type the key name: defaultUserProfilePhoto and paste in the copied url as the value . like This

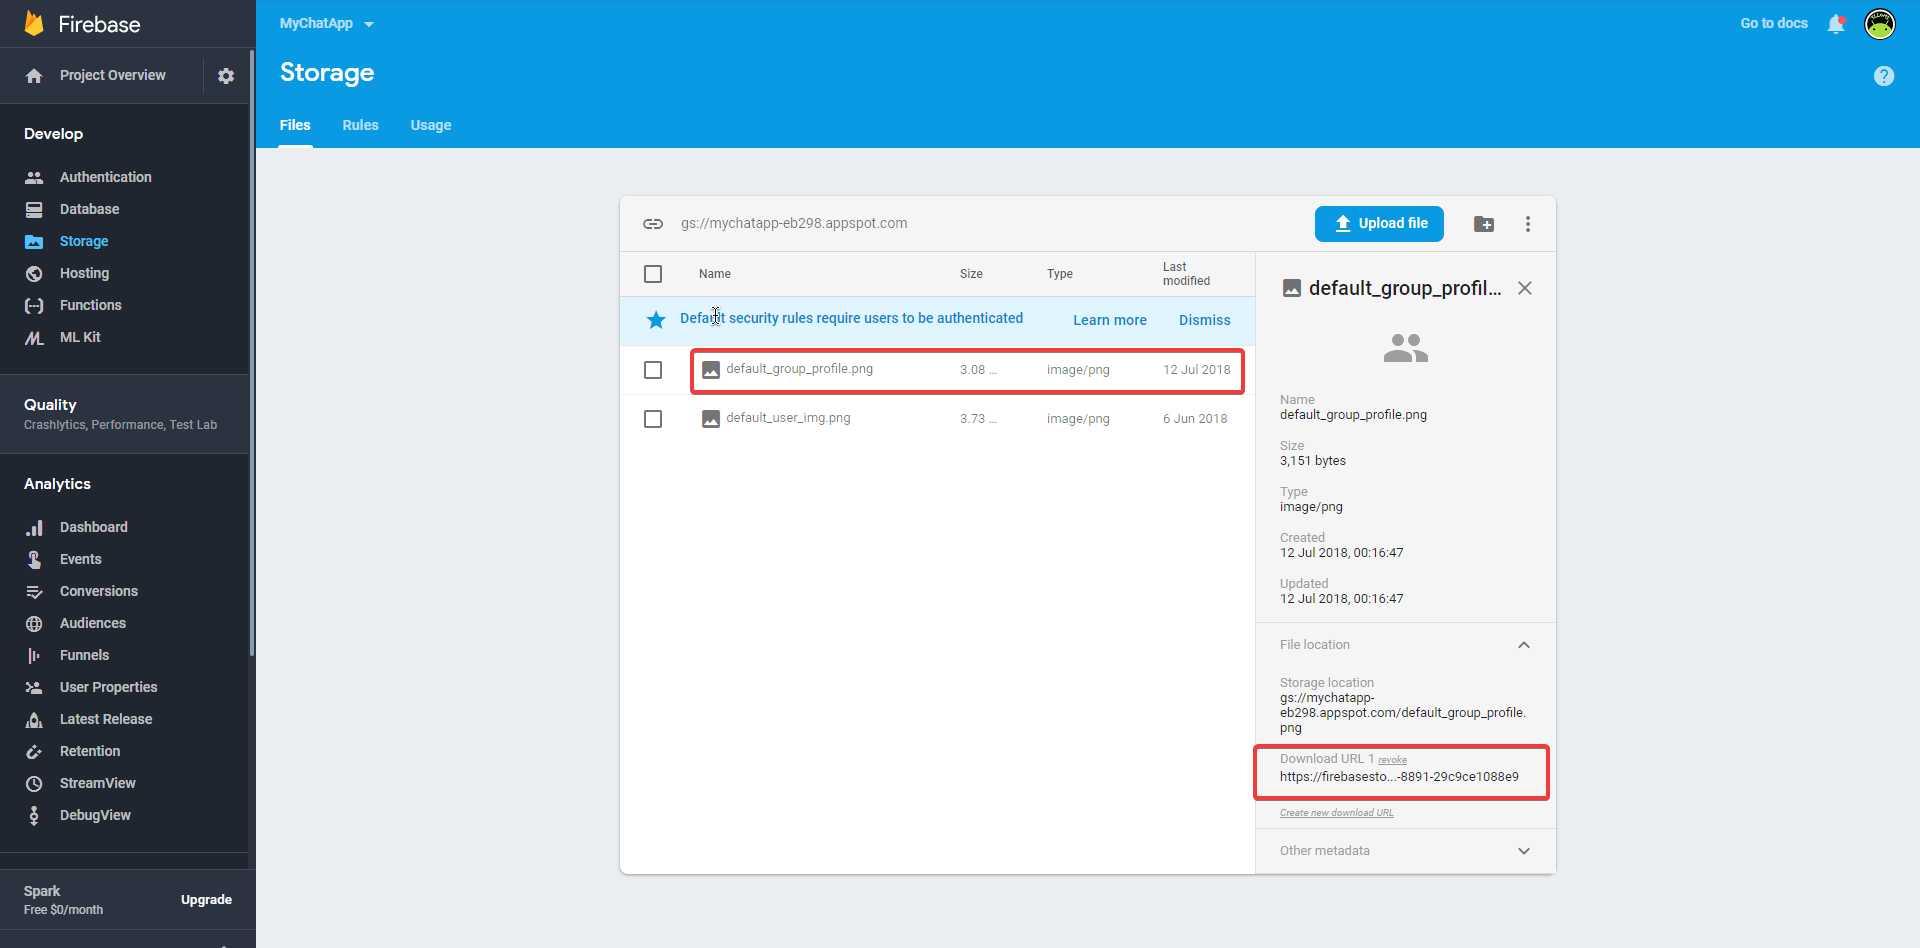
now we have to do the same thing for defaultGroupProfilePhoto:
upload your image or upload the included image in Firebase Console - Files\default_group_profile.png

Firebase Database Security Rules
go to 'Database' > Rules (choose Firebase Realtime Database if prompted)
{warning} if you did not define Security rules the app will not work and you will face some issues while registering for the first time
copy the following rules and replace them ,then click 'Publish'
{
  "rules": {
 ".write":"auth!=null",
   ".read":"auth!=null"
  }
}
Enable Notifications
-
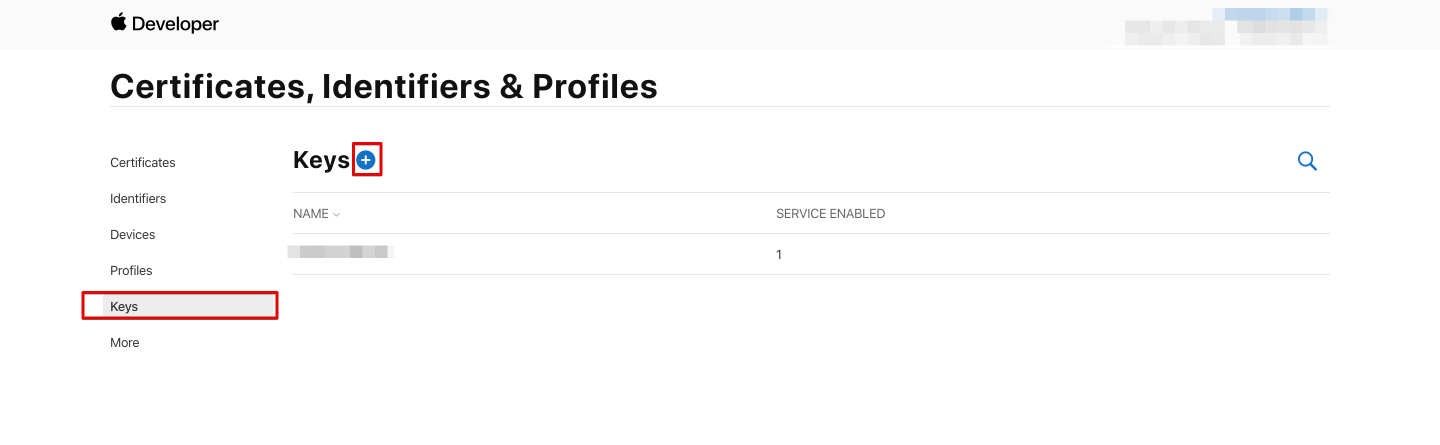
go to Apple Developer Account and Sign in with your Paid Apple Developer account, then go to Keys and click on Plus Icon
-
enter a name for the Key then make sure to select **Apple Push Notifications Service APNs) then click Register
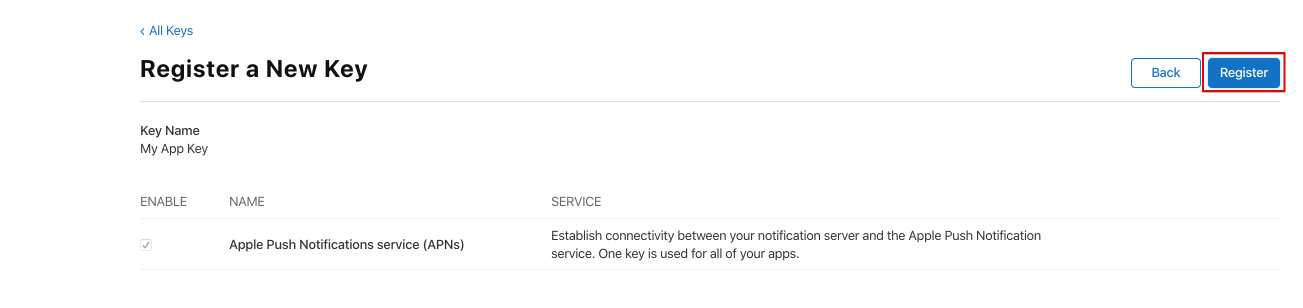
- lastly click on Download to downlaod your key, make sure to save it in secure place, after that copy this Key ID we will use it later.

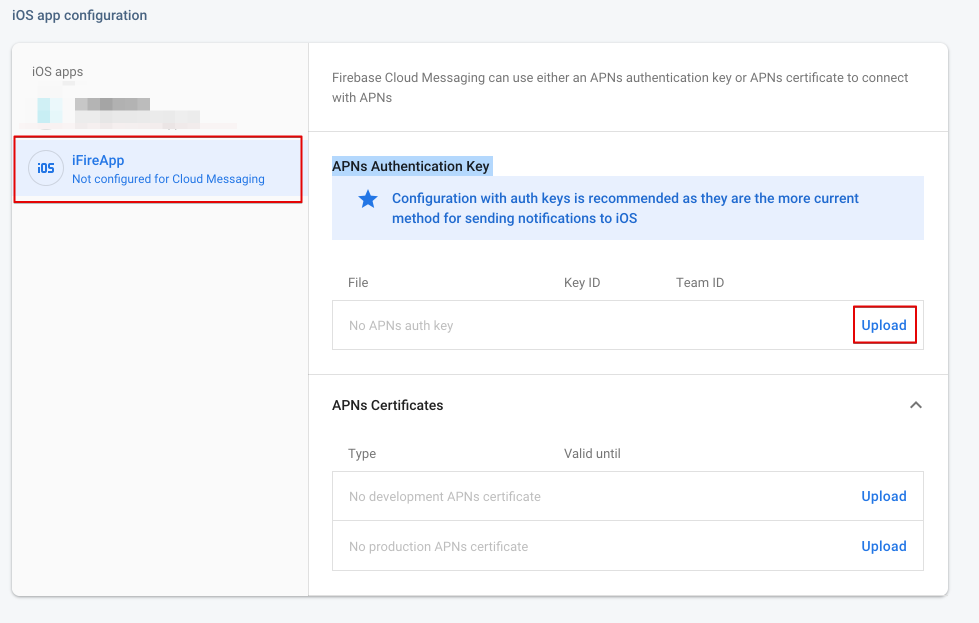
- now go to your Firebase Console > select your project > Project Settings > Cloud Messaging > iOS app configuration, click on Uplaod (make sure you are at APNs Authentication Key section)
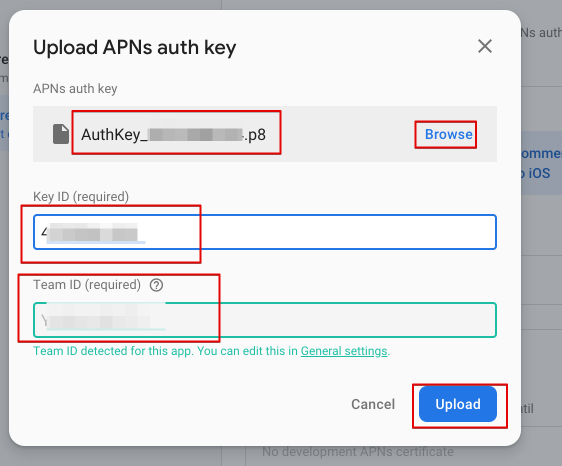
-
click on browse to choose your downloaded key then enter your key ID and Team ID then click on Upload.
Enable Schedule Messages
in order to enable it you have to enable Billing for your Project from this Link, this should be the same Project as your Firebase Project.
after that in Cloud Console go to App Engine > Create a new Instance > choose 'us-central1' if prompted.
make sure that you've selected your project then click on Terminal icon at the top and type in the command
gcloud tasks queues create schedule-message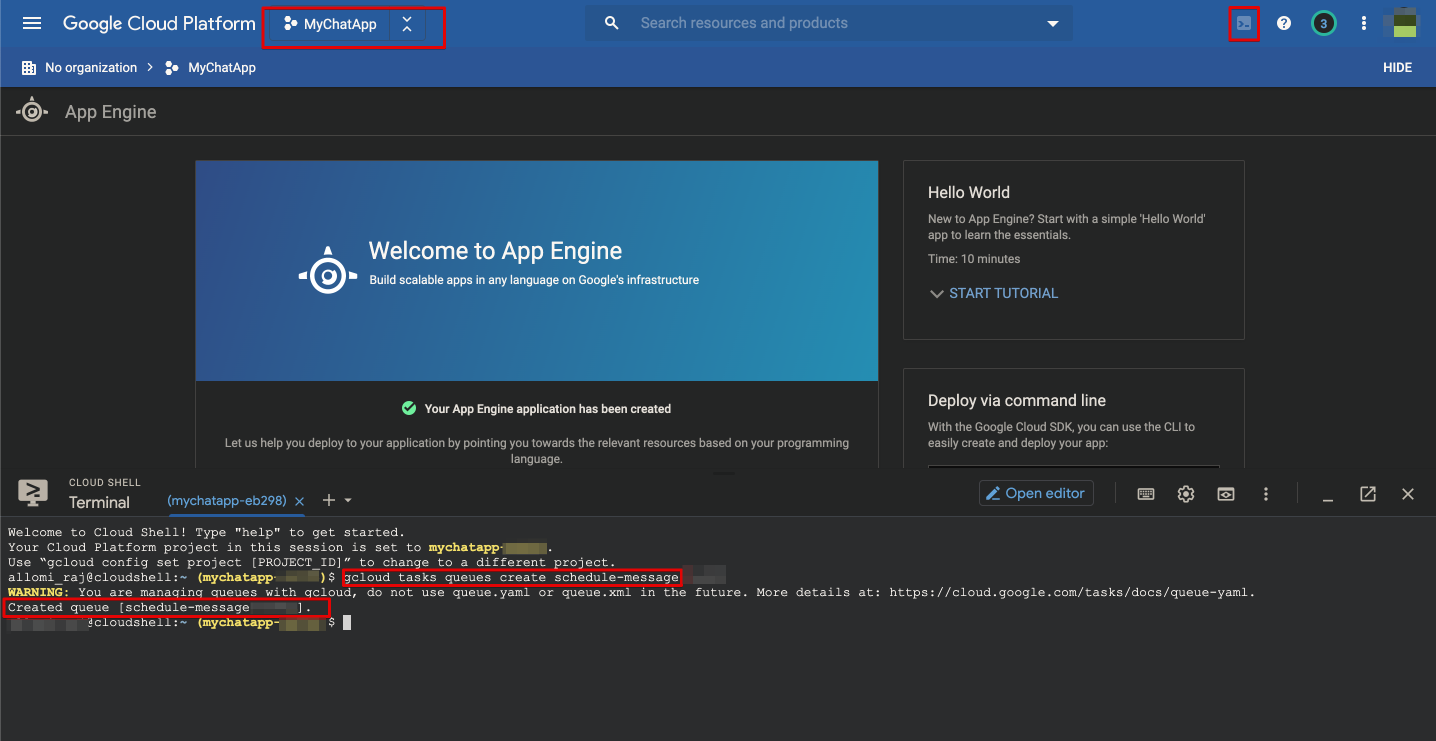
Force Update Mode
starting FireApp Version 1.2 we introduced Force Update Mode which forces the user to update the app on his device. to enable that go to Firebase Console > Database > create a new node by clicking on the little plus icon then add it like the following
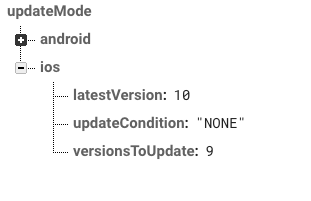
now let's explain these things:
- latestVersion: the latest version of the app, we use
Buildnumber which is included inFireAppTarget or InInfo.plistfile. - versionsToUpdate: specifies which versions needed to update
- updateCondition: we use four conditions to check whether there is an update required
ONLY: show the Force mode ONLY if versionsToUpdate == the client's current versionAND_ABOVE: show the Force mode ONLY if versionsToUpdate >= the client's current versionAND_BELOW: show the Force mode ONLY if versionsToUpdate <= the client's current versionNONE: this is a kill switch if something goes wrong you can setNONEso you can disable update mode for the clients.
please make sure to type the conditions EXACTLY as above as it is case-sensitive.